lecture menu
lecture 7: option syllabus
1. lecture programmeBefore outlining the lectures in this option, I should point out that it is harder to draw clear boundaries around them than in the Web Design Core. In the core there was quite a distinct progression through the syllabus and with only a few exceptions there was no need to mention techniques before you reached the relevant lecture. That is less possible here. Many of these techniques interact - indeed, they need to interact if you are to use them to their full potential. There will be times when I mention something you may not understand at all, but do not feel put off by this - please accept that the details will come, albeit perhaps not until a later lecture. All of the essentials for web design were covered in the Core (lectures 1-6), and everything in these lectures is basically padding; but it is frequently-used padding all the same. The techniques covered in this option are as follows:
There is also a small set of supplementary pages which are entirely optional but will give you some info on techniques you may find useful but which we do not have time to cover in the lectures. Feel free to browse this index at your leisure. (It's optional. Honestly.) Course work for this module is due in the first week of the exam period, which in semester 1 is January 13th. It will be published soon and some advice on completing it will be included in the week 8 virtual lecture. |
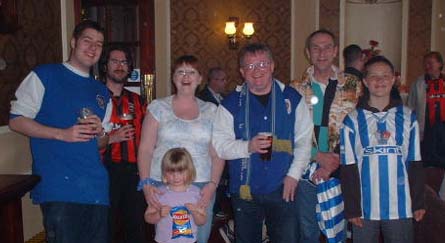
2. this lectureLecture 5 covered the use of images on your site. We saw then that there were various different applications of images, from the purely illustrative, to the informational. Also they could be used for navigation. But - although I did not mention this at the time - there was a slight limit to what could be done with these images. Using a "plain" <img> tag means that each image has to be treated as a "unit". If it is used as a link, for example, it can only be a link to one place. It can only have one alt attribute. But think about the image shown here, of this rather dubious-looking bunch of people (including yours truly skulking, unshaven, at the back). What if you wanted to use this image as a link to several other pages - say, the personal page of each of these individuals?  In this lecture I will tell you about the technique by which you can do this, creating an image map. I will also discuss the potential applications because the aim of this course remains not just to tell you how to do something, but why and when. In the later part of the lecture we will also cover a related but different way of "slicing" up an image, creating a multipart image. Both can add sophistication to your web sites, if used properly. |
