
Web Design |
rollover images |
||||||||
main menushelp pagesprinter-friendly/text-only version
|
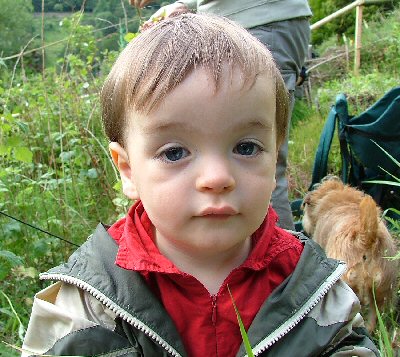
Rollover images can change their state on screen. Usually this happens when the user places his or her mouse pointer over the image. You can do this now if you want to see the image below in its full glory. 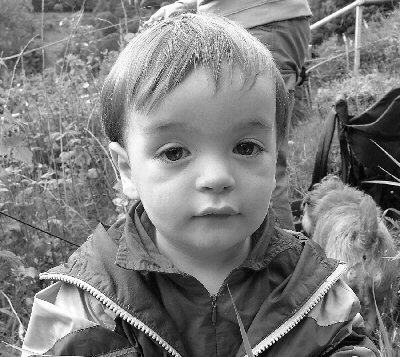 This is a pretty gratuitous use of the technique, but as we'll see there are some more productive applications. To make a rollover, you need two images. In the example above, they are as follows (reduced in size):
It is joe2bw.jpg that is first placed on the page in the normal way, using a standard <img> tag. What you must then do is tell the browser to swap the images over when a particular event happens. It is the idea of events, and how they are defined and used, which is the main topic of lecture 8 (as I hope the virtual lecture made clear). In this case, the event is known as an "onmouseover" event. If that doesn't make sense to you let's put a few spaces in - "on mouse over", or, "do something when the mouse is over something). This is a simple piece of JavaScript. JavaScript events resemble attributes. They are placed inside tags in a similar way, with the same rules: they can appear in any order but always go after the tag name and never appear in the closing tag. There are only certain tags they can appear in, and <img> is not one of them, but that's OK - we can surround the image with an <a> tag and put the event in there, like so:
<a href="#" onmouseover="document.baby.src='joe2.jpg';" onmouseout="document.baby.src='joe2bw.jpg';"> Because the image is not meant to serve as an actual link, the link is what is known as a dummy. The href="#" suggests it is an anchor link, but there is no destination. (Actually, href="#" does have a destination - it will return you to the top of any given page. If the rollover image is not an actual link but is not at the top of a page, you may need to define an anchor link at the image in question.) As to the rest of that HTML, the key to the rollover technique is the name attribute. Just as in anchor tags and the <map> tag, by giving an HTML element a name, you are enabling the browser to refer to that element from another part of the HTML file. In this case, as it happens, the reference is made in the immediate proximity - i.e., the <a> tag immediately surrounding the named image - but it doesn't have to be, as I'll suggest below. Anyway, the onmouseover "attribute" consists of some JavaScript which basically says, "take the element named baby in the current document and change its src to the file joe2.jpg when the mouse is over that element." All rather logical, when you put it like that. The onmouseout event changes things back once you're done. Note that there's nothing stopping you leaving the second image in place, by omitting the onmouseout portion; nor would there be anything stopping you loading up a third image when the mouse moves off, instead of reverting to the original. The tag in which the onmouseover event is located doesn't have to be actually around the image being changed. It's the name which draws the two into a relationship, not their being nested. See this example. These links will actually work if you try them; I do that here to show you how you can nowstart livening up your menu bars:
Note that although the three arrows are identical in terms of the two images which comprise them, they each have different names. They have to, otherwise placing the mouse over any one of the links would cause all three arrows to change simultaneously. This time, the rollover image is not itself a link; rather, the onmouseover and onmouseout events are placed within the active <a> tag surrounding the nearby text. But there's no reason why the event and the image being changed even need to be particularly near each other, though obviously they have to be on screen at the same time, otherwise the procedure is nearly pointless. Of course you could "roll" between two images that were only vaguely related, if at all. I think this is a waste of time, though; if you want to show two images on a page, show them both in the ordinary fashion. The two images below (the one you can see first, and the one you'll see if you place the mouse pointer over it) are vaguely related (that's Lewis Carroll, that is), but what's the point of the rollover? And note the distortion which occurs because the two images are not the same size. No, if you're going to do this sort of thing, have two images that are closely related and generally alike, so the rollover has visual impact and isn't gratuitous.  Remember that in the virtual lecture I combined this technique with a multipart image and made only part of the image roll over, which had a strong visual impact. Also remember that if you are using the technique for any image that is larger than a few Kb - that is, almost all images - you should really preload the image, as if the new image isn't in your cache, the time taken to load it up can completely spoil your use of this technique. A final word of warning - do give the reader cause to place their mouse over a rollover image. If there's one there, tell them about it! Also, don't "hide" important information under a rollover. It's very irritating to come to a page and find that the author has gratuitously hidden half the content simply to show off their mastery of the rollover technique. (Some critics of this style have called it "mystery meat" - like the "meat" in certain take-aways, you don't know what it is until you've taken a bite, and then you might not like it.) As ever, if you're going to do this sort of thing, have a point. But it's very common, and once you've got the two images, quite easy to produce eye-catching effects. It's main use is in livening up your menu bars, and more detail comes on this in lesson 10. | ||||||||
Material on this site is © Drew Whitworth, 2005 Permission will usually be given to reproduce material from this site for non-commercial purposes, if credit is given. For enquiries, e-mail Drew at andrew [dot] whitworth [at] manchester [dot] ac [dot] uk.
 Go to the lesson on