Web Design
starting with image maps
main menus
help pages
printer-friendly/text-only version
The virtual lecture discussed the various applications of image maps and the ways in which you might use them. It also hopefully made clear the basic process: that you have an ordinary image, and then effectively lay a "transparency" over the top of this image which contains the "hot spots" that define the actual links. The place to start, then, is with an image file, and, therefore, an <img> tag. Please do pay close attention to the advice in the virtual lecture about what images make for good image maps, by the way.
The only difference with the <img> tag is that it contains a new attribute: usemap. This attribute basically says to the browser, "there's an image map (transparency) which I want to be laid over this image". This doesn't affect in any way the rendering of the image, so all other attributes (alt, height/width, src, possibly others such as style) can appear as before. (It is a good idea to use height and width when creating images as maps, as you do need to ensure the browser renders the image in the size you expect. Although it usually will anyway, best to be 100% sure.) usemap then takes a value of the name of the map being used.
(Sometimes you see the attribute ismap, but this attribute is involved in a slightly different technique known as server-side image maps. As it is unlikely you will have administrator access to a server, you will not be able to use these therefore I am not teaching them. usemap is for client-side image maps. The "client" is the reader of the page; what "client-side" means is that the image map is applied by the reader's computer (via the techniques I'm about to show you) rather than the host computer. But all in all, and having dragged you screaming to the end of this parenthetical note, I wouldn't worry about it.)
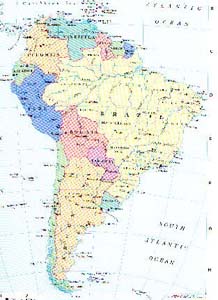
As you'll see on the very brief page about the <map> tag, image maps take the name attribute in the same way as anchor tags (and other features of HTML we haven't yet investigated). And remember that when you want to point to a named anchor, you need to use the hashmark (#) character to refer to that name. The same applies to usemap. These are the only additions you need to make to the <img> tag in order to turn it into a map. So, to refer back to the example used in the virtual lecture, this image has the following tag: <img src="samerica.jpg" alt="A map of South America" height="300" width="218" usemap="#samerica" /> I haven't actually defined the code of the map, samerica, in this HTML file so there aren't any hot spots on this image. I'll build it up as we go through the next few pages. Note also that the inclusion of usemap would usually give the image a "link border", even though it's not enclosed within <a> tags. If you don't want one, use styles to remove it (as I have done to all images on this site). |
 |
Do note that while you're limited to one map per occurrence of an image, there's no reason why you couldn't duplicate an image on another web page - or even, further down the same web page - and have an entirely different map apply to it. All you do is change the value of usemap. Keep that analogy of the image and the transparency in your mind and remember that you can always lay a different transparency over the image, if one's prepared.
