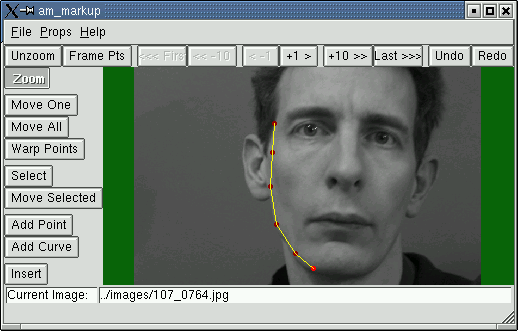
am_markup start
A tool for annotating images and creating connectivity (.parts) files.

Invoke from the command line with
am_markup start
Loading images to annotate
To load a single image, use the "File->Load Image" menu item.
We are so often interested in sets of images, possibly with existing
annotations. The simplest
method of dealing with them is to set up a basic SMD file
listing the images of interest. This can then be loaded using the
"File->Load Image Set". The first image (and any associated annotation points
listed in the SMD file) will then be displayed. You can move through the
set using the arrow buttons above the main window.
This is the preferred technique when marking up a set of images, as the tool
can automatically create a suitable file name for any saved points.
Manipulating the Points
The buttons on the left of the main window
allow selection of a variety of interactions.
The main methods of adding points are as follows:
- Add Point: Each click adds a point (unconnected with others)
- Add Curve: First click adds a point to start a curve. Subsequent clicks
add more points. Double click to complete (open) curve, or
click on the first point in the curve to create a closed curve.
You can also interact with the image and points as follows:
- Zoom: Select a box to zoom in. Double click or hit the "Unzoom" button to display the whole image
- Move All: Dragging with the left mouse button translates the model, dragging with
the right mouse button rotates and scales the model about its centre
- Select: Press and drag to select all points in the resulting box
- Move Selected: As "Move All", but only affects selected points
- Move One: Click near a single model point to drag it around
Saving Results
- The current positions of the points can be saved to a points
file using the "File->Save Points" menu item.
- The current connectivity can be saved to a parts
file using the "File->Save Parts" menu item.
Display Issues
The "Props->Graphics" menu item brings up a panel allowing control of
the graphics (line width, point radius etc)
Generating screenshots
- "File->Save Screenshot" will save the image in the current window, together with any graphical overlays.
